How to install a soft top on a Duetto and the Hardtop
The following photos and instruction will assure an accurate and excellent installation. The Highwoodalfa tops offer best resistance to fading and atmospheric influence. The top looks like the original cotton canvas but lasts longer and holds the colour excellent. Even after several years it looks like new and will give you and your Alfa Romeo Spider so much joy. Easy to fit with our step by step Duetto instruction further down on this site.
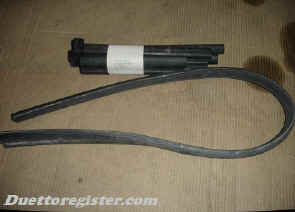
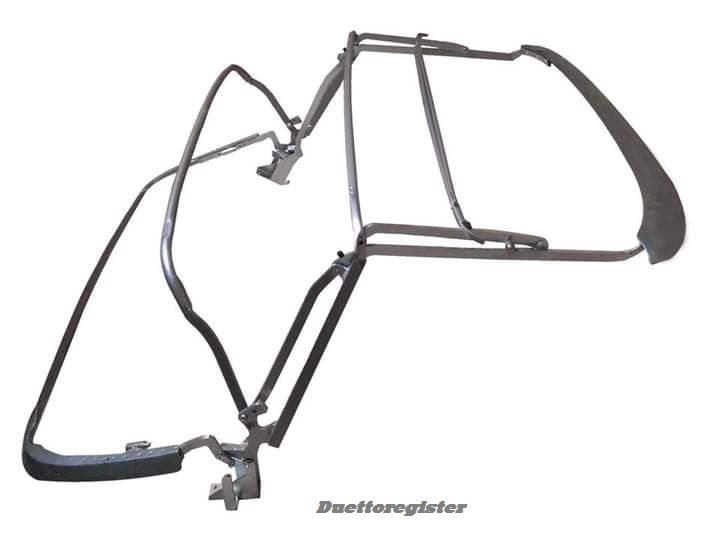
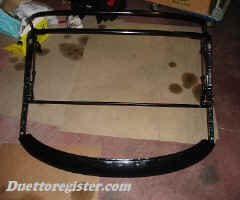
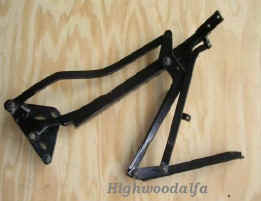
First, the complete frame.
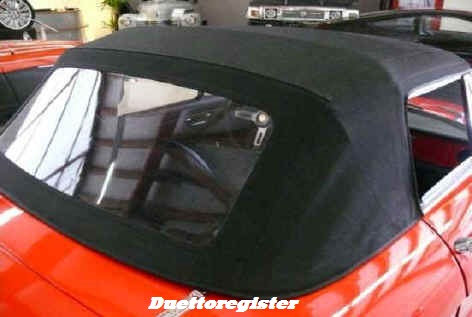
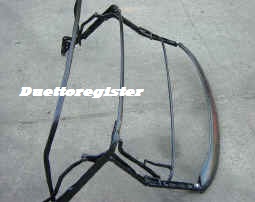
. . . and the complete soft top an a Duetto.
The original Duetto’s soft-top itself was made of impermeable mohair and came in only one colour – black. There was some criticism about rear three-quarter visibility, for the soft-top canvas began immediately aft of the winding windows and there was effectively no wraparound in the flexible vinylite rear window. The soft-top folded in one arm movement. First the over-centre catches securing the front bow to the top of the windscreen frame had to be unclasped and gripping the strap there, the soft top could be arched backward, simultaneously lifting and folding the aluminum alloy arms surrounding the side windows and moving them rearward.

Then the Velcro strips along the R&L cockpit edge could be unfastened to allow the soft-top to fold behind the seats, nearly flush with the bodywork. An additional padded vinyl hood cover was provided to further streamline the appearance. Thanks to 663519 for the contribution.
Highwoodalfa stock the soft top cover as on the photos including metal frame for your Duetto and later Spiders too. Please see model price lists for exterior parts for prices.
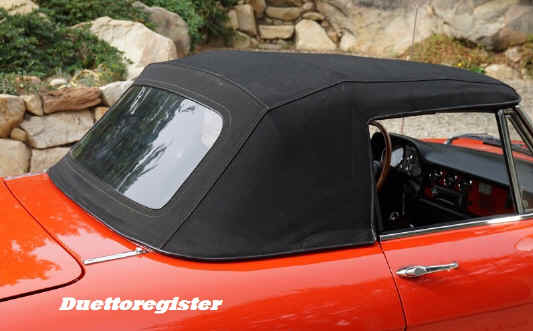
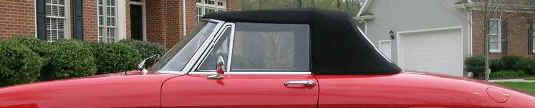
One of the most attractive aspects of the Duetto and 1750 Spider Veloce, the Round-tails, was its folding soft top, which looked great whether up or down. Its ease of operation and effective weatherproofing earned it praise from many quarters as the best convertible top yet made. The later Spiders used the same material and design, but a slightly different frame. The tops are not interchangeable between the Round-tail 1966-1970 and the Kamm-tail Spiders 1970 and on.
The original Duetto’s soft-top itself was made of impermeable mohair and came
in only one colour – black. There was some criticism about rear three-quarter
visibility, for the soft-top canvas began immediately aft of the winding windows
and there was effectively no wraparound in the flexible vinylite rear window.
The Highwoodalfa top is a high-quality product. The
soft-top folded in one movement. First the over-centre catches securing it to
the top of the windscreen frame had to be unclasped using Velcro at the sides.
Then the soft top could be arched backwards, the folded soft-top encroaching
somewhat into the space behind the seats. It was then held tight by pulling a
central strap down and fixing it by Velcro, at that time a novelty.
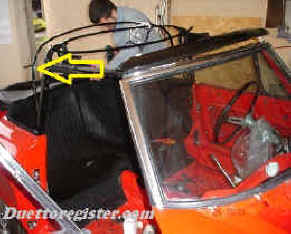
Here
we go replacing the Duetto soft-top.
Re-conditioning of old top bows
First, completely remove the set from the car. In case the pieces are very rusty,
bead blasted all the pieces after full disassembly. Then, all pieces should be
painted to keep the rust from happening again. Use a black colour, not too shiny,
some black velvet make will be fine. The frame is made of cast iron, BTW. The
front section, the piece that is above the windshield is often especially rusty,
and a coat of high quality black paint would be a good choice. Check to make
sure all the threads are good, using taps and dies.
Put the frame together again
Reassemble the bows completely, making sure all pieces are free to move. Attach
all the side weather-strip pieces to the top pieces prior to assembly. This was
originally done using rivets, but can be just as easily done with small screws
of the proper length. The weather-strip has little sheet metal strips that fit
inside them to give good attachment points for the screws.
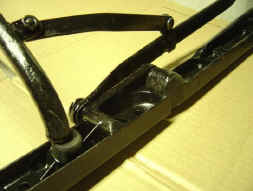
Make sure that the piece at the front just above windshield attachment point on
the front side window pieces is free. These pieces will move freely if working
correctly, but could cause the shoulder bolt here to break if it seizes up.
These pieces are held on by a small cir-clip on the back, and will pull right
out if the cir-clip is removed. Treat the "shaft" with anti-seize
lubricant, and then reassemble.
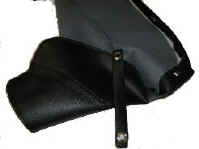
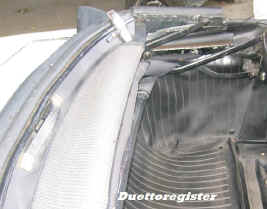
Top attachment, front
After full painting and reconditioning of this section, attach the front
"pocket" of the top to this section. Using either contact cement/glue
here or a high quality double sided tape, and later for points needing glue,
have the parts glued to the front piece. Double-sided adhesive tapes is used by
building constrution companies and carpet companies. This tape is as good as
glue but much easier to handle and it may be adjusted after the job is completed.
Make sure that the piece is in the very centre position of the top
"pocket" i.e. equal amounts of material to either side.
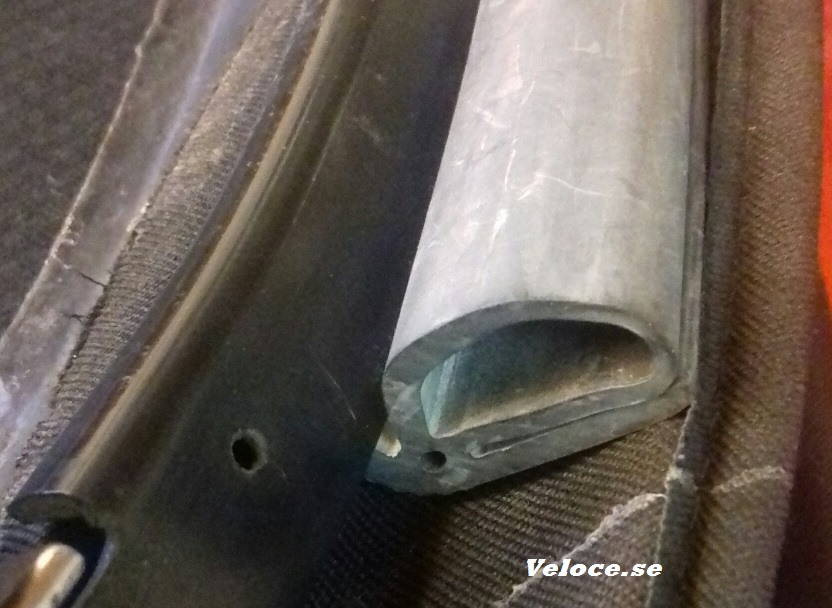
If your frame has the front seal glued, this is how to fit the new seal. The idea is that the flap should be under the L-shaped plastic profile. I use contact glue.
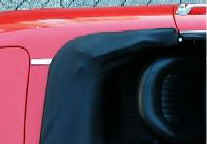
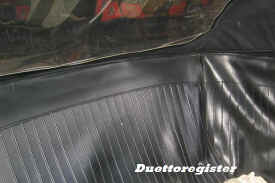
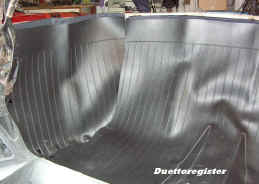
And the rear drape behind the seats
Finally, attach the handle and the chrome pieces attachment guides using the
original screws. The attachment guides should be free to "float"
slightly. If you are lucky, the front of the top and frame will sit perfect to
the windscreen frame.

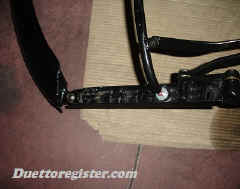
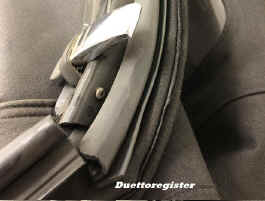
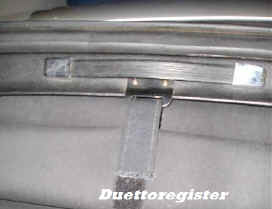
Top attachment rear frame
This is done by crimping the rear top "pocket" under the rear
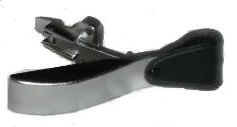
upholstery piece. If you check your old top, there should be a few latches glued
to the canvas. These are positioned just under the rear U-shaped frame.
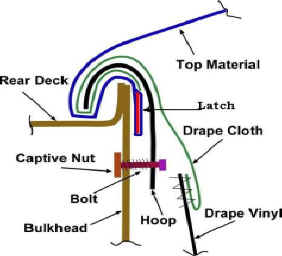
Any craftsman should be able to sew a “pocket” where you put your original latches. The latch is red on the picture above. No need to glue here. I use Velcro, www.velcro.com which is an adjustable fabric hook-and-loop fastener used for connecting various parts and material. Not for Duetto purists though, as Alfa Romeo and Pininfarina used contact glue in 1960’s. Many use double-sided adhesive tapes as this product may be adjusted and removed etc. The www.alfabb.com has good articles in this matter. That is before a more permanent fix, of course. www.3m.com
Remove the rear upholstery piece by removing the bolts that hold it on underneath near the top. Ensure that all the holes have good threads and are sound. Fit the rear top pocket under the upholstery piece, and refit the upholstery piece. Beginning at the sides of the car, reattach the bolts one by one.
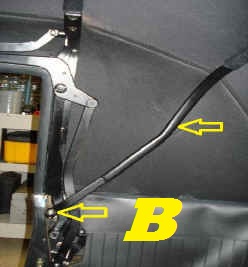
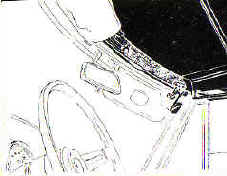
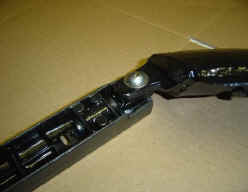
To
adjust the top if it is too tight
If
you feel the top is too tight so you may not be able to close it, don't panic.
The reason is often the the bar just above the rear plastic window is too tight.
Release the bar from the bolts and try again. Then modify the holes until
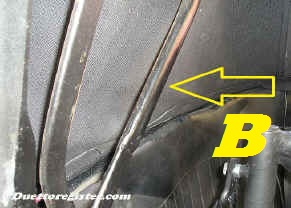
closing the top work well. Pic B below will explain, make the red hole "longer"
using a file to grind it. This part is marked in the other pics also with a B.
Reuse the plastic bushing and lubricate it and will slide and the
support bar will make the top less stretched.

This can be done after the top is glued in place. Then, each year remember to lubricate the support bars behind the B-pillar. The base of the frame at the B-pillar is held by three bolt. If you loose them you may adjust this base up and down, or back and forward to get the proper alignment.